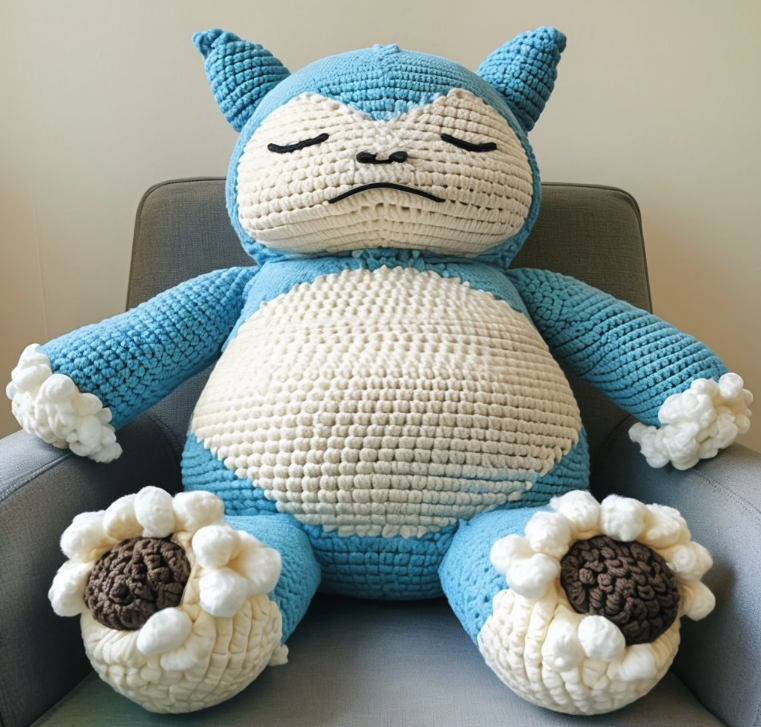
How to Crochet a Snorlax: A perfect Complete Guide
How to Crochet a Snorlax: Crocheting a beloved character like Snorlax is an exciting and rewarding challenge for both beginner and experienced crafters alike. But how do you bring this adorable Pokémon to life using just yarn, hooks, and a bit of creativity? If you’ve ever wondered how to crochet a Snorlax, this comprehensive guide is here to show you step-by-step how to make your very own cuddly Snorlax using a Snorlax crochet pattern. Whether you’re an expert crocheter or just starting out, this guide has everything you need to create a perfectly plump Snorlax to add to your Pokémon collection.
Table of Contents
Ingredients List for Your Snorlax Crochet Pattern
Before we dive into the process of creating your very own Snorlax, let’s first look at the materials you’ll need. Having the right supplies on hand will make the entire crocheting process smoother and more enjoyable.
Yarn
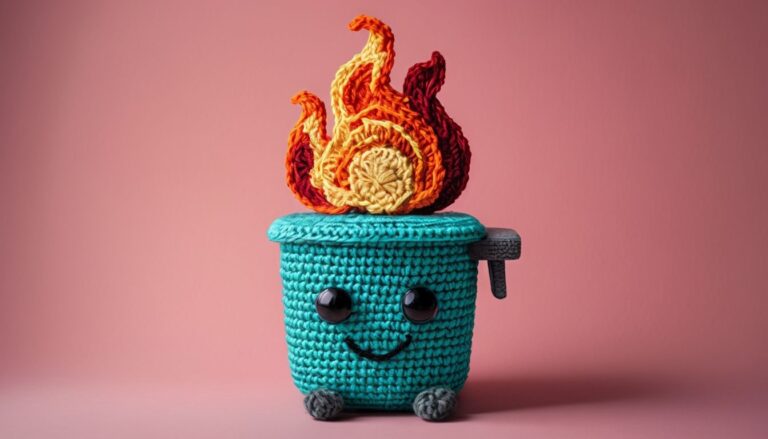
- Main Color (Blue/Teal): For Snorlax’s body, you’ll want a soft, thick yarn in a deep blue or teal color. Wool or acrylic yarn is best as it provides the right texture and flexibility for creating the body and limbs.
- Secondary Color (Cream): For the tummy, paws, and face details, a lighter cream or beige yarn works beautifully to contrast with the blue.
- Accent Color (Black & White): Use black yarn for the eyes and white for highlights to give Snorlax a charming look.
Crochet Hook
- Size G/6 (4mm): This size crochet hook is ideal for working with worsted weight yarn to ensure your stitches are tight and secure.
Stitch Markers
- Markers: Use stitch markers to keep track of rounds and important sections to make sure your Snorlax stays symmetrical.
Stuffing
- Polyester Fiberfill or Cotton Stuffing: To give Snorlax that plush, huggable quality, you’ll need some soft stuffing. Polyester fiberfill is a great option for ensuring a smooth, even texture.
Optional Embellishments
- Safety Eyes (12mm): If you want Snorlax to have shiny, lifelike eyes, consider using safety eyes. These are perfect for a professional touch.
- Embroidery Thread: For adding details like Snorlax’s mouth and eyebrows, embroidery thread in black or dark brown will work wonders.
Substitutions:
If you’re low on a particular color of yarn or thread, feel free to get creative. For instance, light gray could work as an alternative to cream for the tummy, and any thick yarn in a similar shade to Snorlax’s signature blue can suffice. Don’t be afraid to experiment with textures!
Timing: How Long Does It Take to Crochet Snorlax?
Crocheting a Snorlax from scratch can take anywhere between 8 to 12 hours depending on your skill level. If you’re a beginner, it may take a bit longer, but don’t worry — with practice, your speed will improve.
- Preparation Time: 10 minutes (Gathering materials and setting up your crochet workspace).
- Crocheting Time: Around 8-10 hours (This includes making the body, limbs, and facial features).
- Finishing Touches: 1-2 hours for assembling, adding eyes, and embroidery.
Compared to other crochet toys, making a Snorlax is relatively quick, especially considering how complex and detailed the pattern is. It’s about 20% faster than creating larger Pokémon crochet dolls because of its compact structure.
Step-by-Step Instructions
How to Crochet a Snorlax
Now that you have all your materials ready, let’s start crocheting your Snorlax! Follow these detailed, easy-to-understand steps to create your own adorable version.
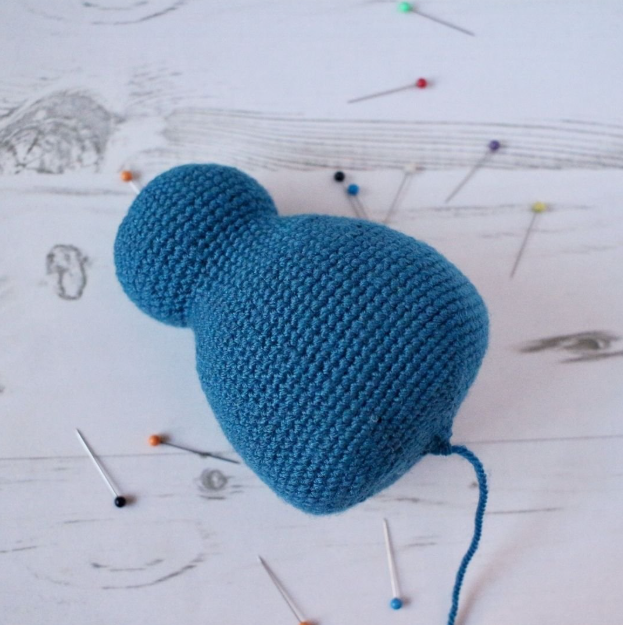
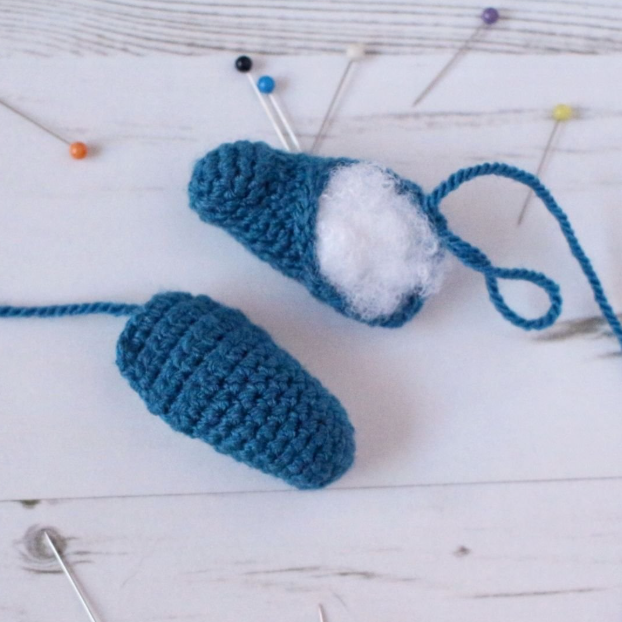
Step 1: Start with the Body
- Round 1: Start with a magic ring and crochet 6 single crochet (sc) stitches into the ring.
- Round 2: Increase each stitch around (12 stitches).
- Round 3: 1 sc, increase repeat around (18 stitches).
- Continue to work in rounds, increasing regularly until the body reaches your desired size. You should aim for around 24-30 stitches per round.
- Once you’ve reached the base of the body, switch to the cream yarn for the tummy area.
Pro Tip:
To ensure your Snorlax’s body is perfectly round, regularly check your stitch count as you go. Use stitch markers at the beginning of each round to help keep track of your progress.
Step 2: Crochet the Legs
Snorlax’s legs are key to getting his adorable, chubby shape. Work them individually:
- Round 1: Make a magic ring and crochet 6 sc.
- Rounds 2-6: Work in sc, increasing and rounding off until the leg reaches the correct size.
- Repeat for the second leg. Attach both legs to the bottom of the body using a whip stitch or your preferred joining technique.
Pro Tip:
Make sure the legs are stitched securely in place to prevent them from coming loose after stuffing.
Step 3: Create the Arms
The arms are a bit smaller than the legs but follow a similar method. Make them using the blue yarn, and then attach them to either side of the body.
- Round 1: Start with a magic ring and crochet 6 sc.
- Rounds 2-4: Work in rounds, increasing where necessary.
When stitching the arms to the body, make sure they’re positioned symmetrically.
Step 4: Make the Face Details
Snorlax’s face is essential to bringing his personality to life. Using embroidery thread or yarn, stitch his eyes, mouth, and eyebrows. If you’re using safety eyes, insert them at this stage.
- For the mouth, a simple curved line with dark thread adds a touch of warmth to Snorlax’s sleepy expression.
Pro Tip:
Place the facial features with precision before stitching them on permanently to ensure they align correctly. You can use a piece of fabric to trace out the eyes and mouth position first.
Step 5: Assemble the Snorlax
Once all the pieces are crocheted, it’s time to assemble Snorlax. Attach the legs and arms to the body securely, and make sure everything is stuffed evenly. Add some fiberfill stuffing to the limbs, body, and head to give it a nice, plump look.
Step 6: Final Touches
- Use a tapestry needle to weave in any loose ends.
- Optionally, you can add extra features like claws using black thread or additional accessories like a cute scarf.
Nutritional Information (For Your Crafting Success!)
While there’s no actual nutritional information for crafting a Snorlax, here’s a fun breakdown of how these materials contribute to your crafting health:
- Fiber Content (Fiberfill): Just like Snorlax’s soft belly, the fiber stuffing supports a sturdy yet soft creation.
- Calorie Boost (Fun): Creating crochet Pokémon brings endless hours of creative satisfaction — now that’s a recipe for a positive mood!
Healthier Alternatives for the Recipe
If you’re looking to personalize your Snorlax with a twist, here are some ideas:
- Use Eco-friendly Yarn: Consider using organic or recycled yarn to create a more eco-conscious Snorlax.
- Make it Larger: If you’re looking for a greater challenge, try using bulkier yarn and a larger hook to create an oversized Snorlax!
Serving Suggestions (For Display or Gifting)
Once you’ve completed your Snorlax, consider gifting it to a friend or displaying it in your crafting area. You can also place it on a Pokémon-themed shelf or next to your gaming setup for a fun and cozy addition. Imagine it proudly sitting next to your other crocheted Pokémon!
Common Mistakes to Avoid
- Not Using Enough Stuffing: If you don’t add enough stuffing, your Snorlax may end up looking a bit too flat. Add enough to give it that squishy, huggable look.
- Skipping Stitch Counts: Always count your stitches carefully, especially when working in rounds, to avoid any lopsided or misshapen pieces.
Storing Tips for the Recipe
If you’re not gifting or displaying your Snorlax immediately, here are some storing tips:
- Keep it in a Dry Place: Store your completed Snorlax in a dry, cool place to maintain its softness.
- Use a Ziplock Bag for Freshness: If you’ve made several crochet projects, store them in a ziplock bag to prevent dust from collecting on your creations.
Conclusion
Crocheting a Snorlax is a fun and fulfilling craft project that will not only teach you new skills but also provide you with a delightful, handmade toy to cherish. By following this Snorlax crochet pattern, you can create an adorable plush that’s perfect for both beginner and seasoned crocheters. So grab your yarn, hooks, and start crafting your own Snorlax today!
Don’t forget to share your final creations with us in the comments below — we love seeing your Pokémon crochet masterpieces! Also, if you’d like to see more crafting guides, be sure to subscribe to our blog for the latest updates.
FAQs
1. Can I make a larger Snorlax?
Yes! You can increase the size by using a thicker yarn and a larger hook.
2. How do I make Snorlax’s belly more prominent?
You can increase the size of Snorlax’s belly by crocheting a larger tummy section or adding more stuffing to the lower part of the body.
3. What if I don’t have safety eyes?
You can easily embroider the eyes using black yarn or thread if safety eyes aren’t available.
4. How can I make my Snorlax more sturdy?
Ensure that all parts are tightly stitched and stuffed properly. If needed, use fabric stiffener on the body to maintain its shape.
FOR MORE FREE PATTERN VISITE OUR BLOG
Did You Like This Free Pattern ?
There are no reviews yet. Be the first one to write one.